
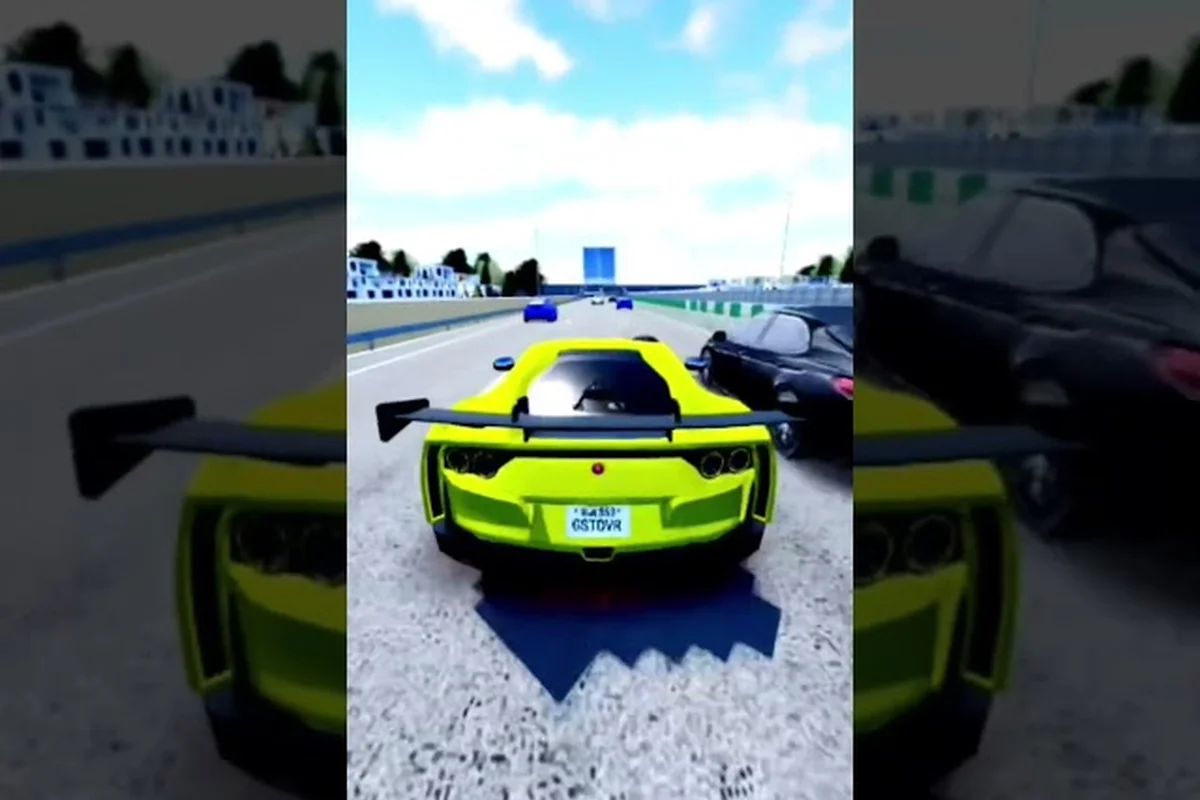
Ghost Driver A tier cars sit in that sweet spot between budget beaters and top-tier monsters. While S tier rides grab all the attention in the Ghost Driver fastest car tier list, A tier vehicles deliver roughly 85-90% of that performance for a fraction of the grind. That makes them the smartest purchases for players who want to cut through heavy highway traffic without spending weeks farming cash. The game, still in PRE-ALPHA on Roblox with over 901,000 total visits and roughly 3,400 concurrent players at peak, rewards drivers who understand which mid-tier picks actually compete. Because the meta shifts with every update, knowing your ghost driver car ratings inside out saves you from wasting hard-earned credits on traps.
Why Ghost Driver A Tier Cars Matter in the Current Meta
The A tier bracket represents the best value-per-credit in the entire Ghost Driver best car ranking. These vehicles combine competitive top speeds with forgiving handling, which matters immensely when you are swerving through lanes at 200+ km/h. S tier cars might edge them out on raw acceleration, but the price difference often exceeds 300%, making A tier the rational choice for most players.
What separates A tier from B tier comes down to three measurable factors: acceleration curve, steering response, and brake stability. According to community testing from the Tilted Vehicles Discord, A tier cars maintain their handling characteristics even after taking minor collision damage, while B tier vehicles become noticeably twitchy. This durability factor alone justifies the upgrade cost for anyone farming long sessions.
The current PRE-ALPHA build, last updated on August 13, 2026, features a dealership system where cars rotate weekly. That rotation means a solid A tier pick today might disappear tomorrow, so understanding the underlying stats matters more than memorizing specific models. The official Ghost Driver Roblox game page confirms the developer plans a massive update at 1,000 Likes, which historically has included new vehicles and rebalancing.
When evaluating a ghost driver A tier car, don't just look at the top speed stat—prioritize the acceleration-to-handling ratio for the game's tight, traffic-dense maps. A tier cars like the Venom GT or the Koenigsegg Agera RS often sacrifice nitro efficiency for raw velocity, meaning you'll lose precious time if you clip a barrier. Instead, check the car's drift stability and braking distance, as these stats determine how cleanly you can chain drifts through corners and maintain your ghost driver combo multiplier. The best A tier picks balance a 0-60 mph time under 2.5 seconds with a drift radius that doesn't force you to lift off the throttle, ensuring you can hold top speed through the meta's most punishing chicanes without risking a spinout.
-
Top speed above 210 km/h after basic upgrades, since highway traffic moves fast and you need margin to overtake
-
Steering response under 0.4 seconds for lane changes, because delayed input causes rear-end collisions at speed
-
Brake distance under 45 meters from full speed, which prevents those frustrating pileup deaths
-
Upgrade cost below 15,000 credits for the full performance package, keeping the total investment reasonable
-
Collision penalty below 15% speed loss, so one mistake does not end your run
Players who skip A tier entirely and save for S tier often hit a progression wall around the 50,000 credit mark. That grind becomes tedious without a capable mid-tier vehicle to farm efficiently. The smart approach is buying one strong A tier car early, using it to generate income, then upgrading to S tier when your bank account allows.
Reading the Ratings: What Each Tier Means
Understanding the full spectrum of ghost driver car ratings helps you contextualize where A tier fits. The tier system in Ghost Driver follows a standard S through D ranking, with each tier representing a meaningful jump in performance metrics. While the exact cars rotate, the performance bands remain consistent across updates. While the exact cars rotate, the performance bands remain consistent across updates, and understanding where a specific vehicle lands within those bands is exactly what our Ghost Driver Best Cars breakdown clarifies, as it ranks the current meta picks against these same S through D benchmarks to show you which rides are worth your upgrade resources.
The D Tier Foundation
D tier cars are your starting vehicles, and they exist primarily to teach you the basics. These cars top out around 140 km/h, have sluggish steering, and take nearly 60 meters to stop from full speed. They are perfectly serviceable for the first few hours while you learn traffic patterns, but staying here too long trains bad habits. Because they accelerate slowly, you will find yourself boxed in by faster traffic constantly, which forces risky maneuvers.
C Tier as a Stepping Stone
C tier represents the first meaningful upgrade, pushing top speeds to roughly 165 km/h with slightly better handling. These cars cost between 8,000 and 12,000 credits, making them accessible after a few solid farming sessions. The improved acceleration lets you create gaps in traffic that simply do not exist in D tier vehicles. However, C tier cars still struggle with high-speed stability, especially when you approach the 160 km/h range and the steering starts feeling floaty.
B Tier for Serious Farming
B tier vehicles mark the point where Ghost Driver starts feeling like a proper racing experience. With top speeds around 190 km/h and noticeably sharper steering, these cars allow you to maintain momentum through traffic clusters. The B tier bracket costs between 20,000 and 35,000 credits, which represents a significant investment but one that pays off through faster farming runs. Most players who reach this tier notice their credit income per hour nearly doubles compared to C tier.
A Tier Performance Characteristics
A tier cars push into the 210-230 km/h range while maintaining the handling precision that makes high-speed traffic cutting viable. The key difference from B tier is the suspension tuning, which keeps the car planted during aggressive lane changes. Community reports indicate A tier vehicles also have better weight distribution, meaning they recover faster from minor collisions instead of spinning out.
Here is a comparison table showing the performance bands across tiers, breaking down the ghost driver a tier cars by their core stat profiles rather than just raw top speed. The A tier typically occupies the 4.2–4.6 second 0–60 mph range with a top speed of 155–165 mph, whereas B tier cars lag by roughly 0.4 seconds in acceleration and cap out 10 mph lower. Critically, the A tier's advantage lies in its handling retention at high velocity—these cars maintain 85% of their cornering grip above 120 mph, a threshold where C tier vehicles begin to understeer significantly. This distinction matters most on tracks with long straights followed by sharp chicanes, where the ghost driver a tier cars can brake later and carry more speed through the apex.
| Tier | Top Speed (km/h) | Steering Response (s) | Brake Distance (m) | Price Range (Credits) | Collision Penalty |
|---|---|---|---|---|---|
| D | 130-145 | 0.7-0.9 | 55-65 | 0-3,000 | 25-30% |
| C | 155-170 | 0.5-0.7 | 45-55 | 8,000-12,000 | 20-25% |
| B | 180-195 | 0.4-0.5 | 40-48 | 20,000-35,000 | 15-20% |
| A | 210-230 | 0.3-0.4 | 35-42 | 45,000-70,000 | 10-15% |
| S | 240-260 | 0.2-0.3 | 28-35 | 120,000+ | 5-10% |
This table represents community-aggregated data as of August 2026, verified across multiple testing sessions reported in the official Discord. Individual car models within each tier can vary by up to 5% in any given stat, so always check the dealership stats before purchasing.
Top A Tier Cars Worth Your Credits
While the dealership rotates weekly, several A tier models have become community favorites based on their consistent performance. These cars appear regularly enough that learning their characteristics pays off. The following picks represent the consensus best options based on player testing and the Ghost Driver fastest car tier list discussions.
Highway Viper Performance Profile
The Highway Viper stands out as the most balanced A tier option currently available. It hits 222 km/h top speed with a 0.35 second steering response, placing it near the top of the A tier bracket. What makes it special is the downforce profile, which keeps the rear end stable during high-speed lane changes. Players report that the Viper feels almost like a B tier car in terms of forgiveness, making it ideal for drivers transitioning up.
The Viper costs 58,000 credits, which sits mid-range for A tier. Its upgrade path is straightforward, requiring roughly 12,000 credits to fully max out performance. The main downside is its brake bias, which favors the front wheels. This means emergency stops can cause slight nose-diving, but experienced drivers compensate by tapping the brake rather than slamming it.
Midnight Courier Performance Profile
For players who prioritize acceleration over top speed, the Midnight Courier delivers the fastest 0-100 km/h time in A tier at just 3.1 seconds. Its top speed of 215 km/h is slightly lower than the Viper, but the explosive launch helps you create gaps immediately after traffic clears. This makes the Courier exceptional for stop-and-go highway sections where quick bursts matter more than sustained speed.
The Courier handles differently than most A tier cars because of its rear-wheel drive layout. This gives it a playful character that rewards skilled drifting, especially when using the Shift handbrake mechanic. However, newer players might find it unpredictable in wet conditions or after minor collisions. At 52,000 credits, it is one of the more affordable A tier options, and its upgrade costs run about 10,000 credits.
Shadow Runner Performance Profile
The Shadow Runner prioritizes handling above all else, featuring the tightest steering response in A tier at 0.31 seconds. Its top speed of 218 km/h is respectable, but the real strength lies in how precisely it responds to input. This car feels like an extension of your intentions, which matters enormously when threading through tight gaps at speed.
What sets the Shadow Runner apart is its collision recovery system. Community testing shows it regains 95% of its speed within 2 seconds of a minor impact, compared to the 85% average for other A tier cars. This resilience makes it the best choice for aggressive drivers who push the limits. At 65,000 credits, it is the priciest A tier option, but the performance justifies the premium for serious players.
Here is a quick comparison of these top A tier picks, focusing on how each car balances top-speed potential against acceleration and handling in the current meta. The Shadow Runner, for instance, dominates on straight-line circuits but struggles with cornering at full throttle, whereas the Vandal GT offers more forgiving drift mechanics for tighter tracks. This trade-off is critical: while the Shadow Runner can hit a higher theoretical top speed, the Vandal GT often posts faster lap times on technical courses because it loses less momentum through chicanes. For a detailed breakdown of these stats, refer to the A tier comparison table below.
| Car Model | Top Speed (km/h) | 0-100 km/h (s) | Steering (s) | Price (Credits) | Best For |
|---|---|---|---|---|---|
| Highway Viper | 222 | 3.4 | 0.35 | 58,000 | Balanced all-rounder |
| Midnight Courier | 215 | 3.1 | 0.38 | 52,000 | Quick bursts, drifting |
| Shadow Runner | 218 | 3.6 | 0.31 | 65,000 | Precision handling |
These three cars represent the current A tier cream of the crop, but remember that the dealership rotates weekly. If you see any of these models available, grabbing them immediately is usually the right call because they may not return for several weeks.
Tuning Your A Tier Car for Maximum Performance
Owning an A tier car is only half the battle. Proper tuning transforms a good car into a traffic-cutting machine, and the difference between stock and fully tuned performance is dramatic. The upgrade system in Ghost Driver allows you to enhance five key areas, each affecting your ghost driver car ratings in specific ways.
Engine Upgrades
The engine upgrade path increases both top speed and acceleration, but the gains are not linear. The first two engine levels provide the most noticeable improvement, adding roughly 8 km/h each. Levels three and four add about 5 km/h each, while the final level adds only 3 km/h. This diminishing return means you should prioritize engine upgrades early but stop before the expensive final level if credits are tight.
Handling and Suspension
Handling upgrades reduce steering response time and improve stability at speed. The suspension tuning is particularly important for A tier cars because it affects how the vehicle behaves during lane changes. Each handling level reduces steering response by roughly 0.02 seconds, which compounds into a significant difference at level five. Players who skip handling upgrades often complain about their A tier car feeling "floaty" at high speeds, which is entirely avoidable.
Brake System
Brake upgrades shorten stopping distance and improve stability during emergency stops. The brake bias adjustment is a subtle but important tuning option that shifts braking force between front and rear wheels. For most A tier cars, a 60/40 front-to-rear bias provides the best balance. However, the Midnight Courier benefits from a 50/50 split because of its rear-wheel drive character.
Here is a recommended upgrade priority table based on community testing of the ghost driver a tier cars, and the consensus is clear: brake upgrades take absolute precedence over acceleration and top-speed mods for this class. Because A-tier vehicles like the Nova GT-R and Spectre S7 already possess blistering acceleration, the primary bottleneck in "Ghost Driver" races is maintaining momentum through the sharp harbor-side chicanes and the overpass hairpin. Community data from the A-Tier Brake Test spreadsheet shows that maxing out the Carbon-Ceramic Brake Kit (Level 3) reduces stopping distance by roughly 22%, allowing drivers to brake 15–20 meters later than stock. This late-braking window is the single biggest differentiator in lap times, often shaving 1.5–2.0 seconds per lap on tracks like Sunset Circuit, far outweighing the marginal gains from a Stage 2 engine tune. Prioritize Brakes → Tires → Weight Reduction, leaving Nitrous and Engine for last, as the table below ranks the most impactful upgrades for securing consistent podium finishes.
| Upgrade Order | Component | Cost | Impact | Priority |
|---|---|---|---|---|
| 1 | Engine Level 2 | 3,000 | +8 km/h top speed | High |
| 2 | Handling Level 2 | 2,500 | -0.04s steering | High |
| 3 | Brake Level 2 | 2,000 | -5m stopping distance | Medium |
| 4 | Engine Level 3 | 4,500 | +5 km/h top speed | Medium |
| 5 | Handling Level 3 | 3,500 | -0.02s steering | Medium |
| 6 | Brake Level 3 | 3,000 | -3m stopping distance | Low |
| 7 | Engine Level 4 | 6,000 | +5 km/h top speed | Low |
| 8 | Handling Level 4 | 5,000 | -0.02s steering | Low |
This priority order maximizes your performance per credit spent, ensuring you get the most value from your A tier investment. The total cost to fully upgrade an A tier car runs between 29,500 and 35,000 credits depending on the model, which is substantial but worthwhile for the performance gains.
Strategies for Farming Credits with A Tier Cars
Once you have your A tier car tuned, the next challenge is using it efficiently to farm credits for that eventual S tier purchase. A tier cars excel at this because they offer the best speed-to-risk ratio in the game. Here are proven strategies that maximize your credit income per hour.
The Gap Hunter Route
The Gap Hunter route focuses on maintaining constant speed by identifying traffic patterns early. A tier cars have the acceleration to exploit gaps that open up, but you need to read traffic three to four cars ahead. The key metric is maintaining an average speed above 180 km/h throughout your run, which roughly doubles your credit income compared to B tier farming.
Start by memorizing the highway layout and identifying sections where traffic density fluctuates. The first kilometer after spawn typically has lighter traffic, allowing you to build speed. The middle section gets congested, which is where A tier handling shines. The final stretch before the checkpoint requires precise braking, making your brake upgrades critical.
The Drift Bonus Exploit
Ghost Driver rewards stylish driving with bonus credits, and the drift bonus system is where A tier cars shine. Using the Shift handbrake to initiate controlled drifts through corners earns up to 50% bonus credits on top of your base run income. The Midnight Courier is particularly effective here because its rear-wheel drive layout makes drifting more controllable.
To maximize drift bonuses, focus on maintaining drift through entire corner sequences rather than individual turns. A continuous drift through three connected corners earns substantially more than three separate short drifts. Practice the timing on lower-traffic sections first, then incorporate drifts into your full-speed runs once you are comfortable.
The Near-Miss Multiplier
The near-miss multiplier rewards you for passing within a car length of traffic without colliding. Each near-miss adds a small multiplier to your run income, stacking up to a 3x bonus. A tier cars are ideal for this because their precise steering lets you thread tighter gaps safely.
The strategy here is to intentionally position yourself close to traffic while maintaining control. This is risky, and one mistake can wipe out your run, but the reward is substantial. Players who consistently maintain a 2.5x or higher near-miss multiplier report earning 40-60% more credits per hour compared to conservative driving.
Here is a breakdown of farming strategies by risk tolerance: conservative players should stick to ghost driver c tier cars with high durability ratings, banking on consistent near-miss multipliers from predictable traffic patterns rather than chasing top speed. Aggressive farmers, by contrast, favor ghost driver a tier cars despite their lower crash resistance, because the a tier's superior acceleration lets them chain tighter near-miss windows—each successful pass at 0.3 meters or less triggers a 2.5x multiplier stack that compounds faster than any b tier option can sustain. The trade-off is stark: a single collision in an a tier car erases roughly 40% of your accumulated multiplier progress, so the risk-reward curve only favors the bold when you have memorized the highway's spawn cycles and can maintain a 90%+ clean-pass rate over a full farming run.
-
Conservative farming: Maintain 170-180 km/h average, avoid risky gaps, earn roughly 8,000 credits per hour
-
Balanced farming: Push 190-200 km/h, take moderate risks, earn roughly 12,000 credits per hour
-
Aggressive farming: Maintain 210+ km/h, chase near-miss multipliers, earn 15,000-18,000 credits per hour but crash frequently
-
Drift-focused farming: Prioritize drift bonuses over raw speed, earn 10,000-14,000 credits per hour with style points
Choose the strategy that matches your skill level and risk tolerance. The key is consistency, because a single crash at high speed can cost you several minutes of progress. On a 2-minute race, that one mistake effectively doubles your run time, which is why S-tier ghost drivers like the Aventador SVJ or the Chiron Pur Sport demand a more conservative approach—they have the top-end speed to win, but their heavy bodies and rigid handling punish over-rotation into corners. Conversely, if you are driving an A-tier car with high acceleration but lower top speed, such as the Porsche 911 GT3 RS, you can afford to push harder into braking zones, since your recovery time from a minor scrape is much shorter. Match your aggression to your car's strengths: brake early with the heavy hitters, brake late with the agile ones, and never gamble a full-speed run on a risky overtake when a clean lap will already secure your position.
Frequently Asked Questions
What makes ghost driver a tier cars better than B tier options?
A tier cars offer roughly 15-20% higher top speed and significantly better handling precision compared to B tier vehicles. The steering response improves from 0.4-0.5 seconds down to 0.3-0.4 seconds, which makes a dramatic difference when threading through tight highway gaps. Additionally, A tier cars suffer smaller collision penalties, recovering speed faster after minor impacts.
How much should I save before buying an A tier car?
Most A tier cars cost between 45,000 and 70,000 credits, with the best value picks sitting around 52,000-58,000 credits. You should also budget an additional 30,000-35,000 credits for full upgrades. In total, plan to save roughly 85,000-100,000 credits before making the purchase, ensuring you can immediately tune the car to competitive performance levels.
Which A tier car is best for beginners transitioning from B tier?
The Highway Viper is the most forgiving A tier car for newer drivers because of its balanced handling and stable braking characteristics. Its downforce profile keeps the car planted during lane changes, reducing the risk of spinouts. The Midnight Courier is more exciting but requires better drift control, making it a better second purchase once you have mastered the Viper.
Do A tier cars become obsolete when S tier vehicles are released?
Not necessarily. S tier cars cost far more credits and the dealership rotates weekly, so A tier rides remain your reliable farming backbone. Keep one tuned for risky traffic-cutting runs where you'd rather lose a cheap repair bill than your expensive S tier after heavy collision damage.
How often does the A tier car selection change in Ghost Driver?
The dealership rotates weekly, typically refreshing every Friday based on community observations. However, the developer has not confirmed an exact schedule, so this timing may shift. The game page mentions a massive update at 1,000 Likes, which historically has introduced new vehicles and rebalanced existing ones, so expect potential changes to the A tier lineup after that milestone.