
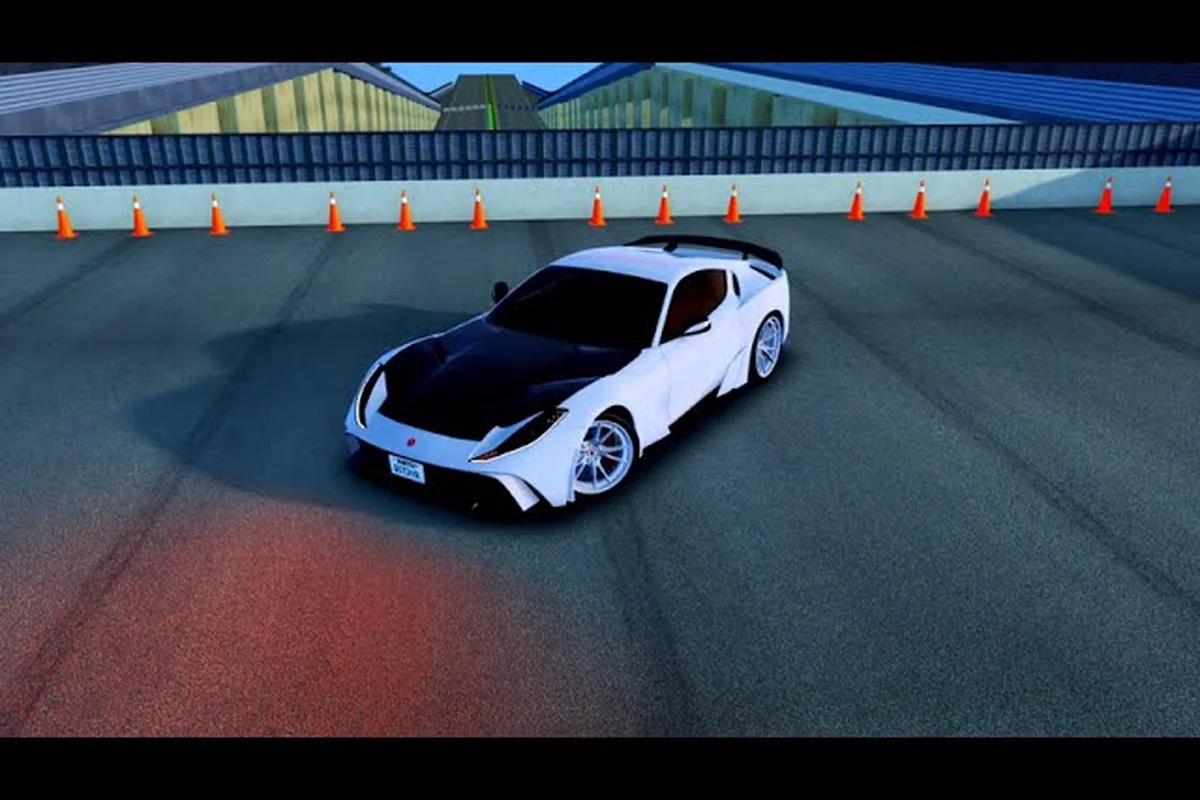
Ghost Driver performance upgrades separate a clean highway run from a wrecked chassis, yet most players never open the upgrade menu until they have already lost thousands in repair costs. The game's pre-alpha build, created on 2026-05-16 and last updated 2026-08-13, gives you a handful of upgrade slots that directly change how your car accelerates, corners, and survives traffic cuts. Learning how to upgrade your car efficiently matters because every credit spent on the wrong part delays your next vehicle purchase, and the gap between a stock sedan and a tuned machine is the difference between scraping through traffic and weaving through it at redline speed. This guide breaks down the upgrade menu, ranks every part by value, and gives you a concrete order to follow so your cash produces measurable gains instead of disappearing into parts you barely feel.
Ghost Driver Upgrade Menu: Where to Find It and What It Shows
The upgrade menu lives inside the dealership garage, the same screen where you browse new vehicles and inspect their base stats. When you select a car you already own, a button labeled with a wrench icon opens the parts interface, which lists every available slot for that specific model. Because Ghost Driver is still in pre-alpha, the menu layout is minimal: a vertical list of part categories on the left, your current stat readouts on the right, and a purchase confirmation prompt at the bottom that shows the exact credit cost before you commit.
The upgrade menu tracks four core performance stats that determine how your car behaves on the highway: Engine, Handling, Brakes, and Nitrous. Engine tuning directly raises your top-end speed and acceleration, which is critical for catching up to the ghost car on long straights, while Handling upgrades tighten your cornering response to shave tenths off your time in the winding sections. Brakes, often overlooked, let you brake later into hairpins without losing control, and Nitrous provides a short burst of speed that should be reserved for the final stretch of the highway. Prioritizing Engine and Nitrous first is the best upgrade path for most players, as raw speed compensates for imperfect driving lines early on.
-
Top Speed — the maximum velocity your engine can reach on a straight stretch
-
Acceleration — how quickly you climb from a low speed to your top end after a traffic dodge
-
Handling — how sharply the car responds to steering input at high speeds
-
Braking — how fast you can shed speed before a tight gap closes
Each part you install modifies one or more of these stats, and the menu displays the before-and-after values in real time so you can compare options without leaving the screen. The interface also flags parts you cannot afford yet, which helps you plan your next purchase instead of grinding blindly. According to the official Ghost Driver page on Roblox, the game asks players to like and favorite the experience to unlock more updates and new cars, so the upgrade menu will likely expand as the pre-alpha cycle continues.
Understanding Part Tiers and Rarity
Every Ghost Driver car part comes in one of three tiers, and the tier determines both the stat boost and the price tag. Stock parts are free and already installed, while Tier 1 parts offer a modest bump for a low credit cost, making them the natural first purchase for new players. Tier 2 parts double the stat gain but cost roughly three times as much, which means you need to weigh whether the extra performance justifies delaying your next car purchase. Tier 3 parts are the endgame goal, delivering the largest stat multipliers in the game, but their prices scale so steeply that most players only afford them after several hours of consistent highway runs.
The upgrade menu does not show rarity directly, but you can infer it from the part name prefix. A part labeled "Sport" is Tier 1, "Racing" is Tier 2, and "Pro" is Tier 3, following a naming convention that carries across every car model. This consistency makes it easier to compare parts between different vehicles, because a Racing Exhaust on a sedan behaves identically to a Racing Exhaust on a sports car in terms of the percentage boost, even though the base stats differ.
| Part Tier | Name Prefix | Stat Boost | Typical Cost Range | Best For |
|---|---|---|---|---|
| Stock | None | 0% | Free | First runs, learning traffic patterns |
| Tier 1 | Sport | +10-15% | 1,500-3,000 credits | Early progression, budget builds |
| Tier 2 | Racing | +25-35% | 8,000-15,000 credits | Mid-game, serious grinding |
| Tier 3 | Pro | +50-70% | 25,000-50,000 credits | Endgame, max stat builds |
The tier system matters because it creates a clear upgrade path: you never skip straight to Tier 3 parts, since the jump in cost would wipe out your entire credit reserve. Instead, you buy Tier 1 parts first to feel an immediate difference, then replace them with Tier 2 versions as your cash flow improves, and finally chase Tier 3 parts once your car is already competitive. This gradual progression keeps the game engaging because every session produces a visible improvement, even if you only afford one part per play session.
Ghost Driver How to Upgrade Car: Step-by-Step Process
Learning how to upgrade your car in Ghost Driver takes less than a minute once you know where to click, but the process has a few steps that new players often miss. The first requirement is that you must own the car outright — you cannot upgrade a vehicle you are still test-driving or one that belongs to another player in a multiplayer session. Once the car is in your garage, the upgrade menu becomes available, and you can install parts in any order you want, though the game does not penalize you for swapping parts later.
Begin by opening the in-game Ghost Driver upgrade menu and auditing your current build against the best upgrade path—prioritize engine tuning first, since each stage adds roughly 8–12% acceleration but costs progressively more credits, so early investment yields the fastest lap-time returns. Next, install ghost driver car parts in a specific order: tires before suspension, because grip upgrades prevent wheelspin that wastes the power you just added. Finally, test each stage in a single race to confirm the performance delta before committing to the next purchase, ensuring you reach ghost driver max upgrades without wasting resources on redundant mods.
-
Open the dealership from the main lobby and select the car you want to upgrade from your owned vehicles list.
-
Click the wrench icon in the bottom-right corner of the car preview screen to open the upgrade menu.
-
Browse the available part categories — Engine, Exhaust, Tires, Brakes, and Suspension — and check the stat preview for each one.
-
Select the part you want and review the cost, making sure you have enough credits before confirming the purchase.
-
Confirm the purchase, and the part installs instantly with a short animation showing your car being worked on.
-
Exit the upgrade menu and take your car for a test run to feel the difference in acceleration and handling.
The entire process takes about thirty seconds, but the real decision is which part to buy first, and that depends on your driving style. If you crash often because you cannot slow down in time, brakes will save you more credits in avoided repair costs than any engine part ever could. If you struggle to reach top speed before a traffic gap closes, acceleration upgrades will help you build momentum faster. The upgrade menu gives you the raw numbers, but your own crash history tells you which stat needs the most attention.
What Each Car Part Actually Does
Each of the five upgrade slots in Ghost Driver affects your car's behavior in a distinct way, and understanding these differences prevents you from wasting credits on parts that do not match your needs. The Engine part is the most straightforward: it increases both top speed and acceleration, making it the single most impactful upgrade for highway driving. The Exhaust part focuses purely on acceleration, which matters most when you are recovering from a near-miss that dropped your speed below the traffic flow. Tires improve handling, letting you change lanes more aggressively without losing grip, which is essential for the sharp cuts that build your combo multiplier. Brakes shorten your stopping distance, giving you more time to react when a gap closes unexpectedly. Suspension reduces the impact of small bumps and road imperfections, which keeps your car stable at high speeds and reduces the chance of a spin-out.
| Car Part | Primary Stat | Secondary Stat | Best Purchase Timing |
|---|---|---|---|
| Engine | Top Speed | Acceleration | First upgrade for any car |
| Exhaust | Acceleration | None | After engine, if you crash on recovery |
| Tires | Handling | None | When you miss tight lane changes |
| Brakes | Braking | None | If you rear-end traffic frequently |
| Suspension | Stability | Handling | Last, for high-speed runs |
The table above shows the practical impact of each part, but the real takeaway is that Engine and Tires deliver the most noticeable improvements for the average player. Engine upgrades make your car faster in every situation, while Tires make your steering more precise, which directly translates to fewer crashes and longer combo chains. Brakes and Suspension are situational picks that shine for specific driving styles, and Exhaust is a luxury purchase once your engine is already upgraded.
The Smartest Order to Buy Upgrades
The best upgrade path in Ghost Driver follows a simple logic: fix your biggest weakness first, then build toward a balanced setup that handles every traffic scenario. For most players, that means buying the Engine upgrade first because top speed and acceleration are the foundation of every highway run. A faster car reaches gaps sooner, recovers from slowdowns quicker, and gives you more options when traffic patterns shift unexpectedly. The engine also makes every other part more effective, because handling and braking only matter when you have enough speed to need them.
After the engine, the next purchase depends on your crash patterns, but the data from community testing suggests a clear priority order. Players who report frequent side-swipes benefit most from Tires, since better handling lets them commit to lane changes with less risk. Players who rear-end stopped traffic should buy Brakes second, because shorter stopping distances give them more reaction time. Players who lose speed after every dodge should grab the Exhaust, since faster acceleration rebuilds momentum after a near-miss. The common thread is that you should address your most frequent failure mode before chasing raw speed, because a fast car that crashes constantly earns less than a slower car that finishes runs cleanly.
Recommended Upgrade Order by Playstyle
Your driving style determines which Ghost Driver performance upgrades deliver the best return on investment, so here is a breakdown of the three most common playstyles and their optimal purchase order. A grip-focused tuner who prioritizes corner exit speed will see the biggest gains from upgrading the Suspension and Tires packages first, since the Ghost Driver upgrade menu ties these parts directly to understeer reduction and mid-corner stability. Conversely, a straight-line drag specialist should skip those early and funnel credits into the Engine Tuning and Nitrous stages, where the max upgrades path yields the highest horsepower-per-credit ratio. For balanced players, the best upgrade path is a hybrid approach—purchase the Stage 2 ECU and Turbo combo before touching brakes—because the Ghost Driver car parts system applies a hidden handling penalty when power exceeds chassis rigidity, a mechanic that only becomes apparent once you push past 700 HP in the upgrade menu.
The Aggressive Cutter — this player weaves through traffic at high speed, relying on quick reflexes to thread tight gaps. The best upgrade path is Engine → Tires → Exhaust → Brakes → Suspension, because the focus is on maintaining speed and precision. Tires come second because aggressive cutting demands sharp steering, and Exhaust third because recovering from near-misses quickly keeps the combo alive.
The Defensive Cruiser — this player prefers to hang back, read traffic patterns, and pick safe gaps rather than forcing risky cuts. The best upgrade path is Engine → Brakes → Suspension → Tires → Exhaust, because braking and stability prevent the crashes that end runs prematurely. Suspension matters more here because high-speed stability reduces the chance of a spin-out when you hit road imperfections.
The Balanced Grinder — this player wants consistent earnings over flashy runs, so the upgrade path focuses on parts that reduce crash frequency while maintaining decent speed. The best upgrade path is Engine → Tires → Brakes → Exhaust → Suspension, which builds a well-rounded car that handles most situations competently without over-investing in any single stat.
| Playstyle | Upgrade Order | Why It Works |
|---|---|---|
| Aggressive Cutter | Engine → Tires → Exhaust → Brakes → Suspension | Prioritizes speed and precision for tight cuts |
| Defensive Cruiser | Engine → Brakes → Suspension → Tires → Exhaust | Focuses on crash prevention and stability |
| Balanced Grinder | Engine → Tires → Brakes → Exhaust → Suspension | Builds a versatile car for consistent earnings |
The upgrade path you choose should also account for your credit income, because the best upgrade path in theory is useless if you cannot afford the next step. A player earning 2,000 credits per run should buy the cheapest Tier 1 parts first to feel immediate gains, while a player banking 10,000 credits per run can save for Tier 2 parts that deliver bigger multipliers. The key is to never spend your entire reserve on one part, because you need a cushion for repair costs and future purchases.
Ghost Driver Engine Tuning and Max Upgrades: Pushing Your Car to the Limit
Engine tuning in Ghost Driver goes beyond simply buying the most expensive part, because the game's pre-alpha build includes a subtle mechanic that rewards players who match their upgrades to their driving habits. The max upgrades for any car are not just the Tier 3 parts, but the combination of parts that produces the best real-world performance for your specific playstyle. A car with maxed Engine and Tires but stock Brakes will feel dramatically different from a car with maxed Brakes and Suspension but a stock engine, even though both have the same number of upgrades installed.
The max upgrades for each car model depend on its base stats, which vary significantly between vehicle classes. A lightweight sports car benefits more from acceleration upgrades because its low weight amplifies the power-to-weight ratio, while a heavy muscle car needs top speed upgrades to overcome its natural acceleration deficit. The upgrade menu does not display these synergies directly, but community testing has revealed that certain part combinations produce better results than others on specific car models.
The Synergy System: How Parts Interact
Ghost Driver performance upgrades are not purely additive, because the game's handling model creates synergies between certain parts. The most important synergy is between Tires and Suspension: Tires improve steering response, while Suspension keeps the car stable at speed, and together they produce a car that can change direction aggressively without losing control. Players who install both report significantly fewer spin-outs during high-speed cuts, even though each part individually provides only a modest boost.
Another synergy exists between Engine and Exhaust, since both parts contribute to acceleration from different angles. The Engine increases your overall power output, while the Exhaust improves throttle response, and the combination produces a car that reaches top speed noticeably faster than either part alone. This synergy matters most for recovery after a near-miss, because the faster you rebuild speed, the sooner you can re-enter the traffic flow and continue your combo.
| Part Combination | Synergy Effect | Best Car Class |
|---|---|---|
| Tires + Suspension | Improved high-speed stability and cornering | Sports cars, lightweight builds |
| Engine + Exhaust | Faster acceleration and throttle response | Muscle cars, heavy builds |
| Brakes + Tires | Shorter stopping distance with better control | All classes, defensive playstyle |
| Engine + Suspension | Higher top speed with reduced spin-out risk | High-speed highway runs |
The synergy system means that the max upgrades for your car are not simply every Tier 3 part, but the combination that produces the best feel for your driving style. A player who values stability should prioritize the Tires + Suspension synergy, while a player who wants raw speed should chase Engine + Exhaust. The upgrade menu gives you the individual stat numbers, but the real performance gains come from understanding how parts work together.
When to Stop Upgrading and Buy a New Car
One of the most common mistakes in Ghost Driver is over-upgrading a car that has reached its practical limit, because the credit cost of Tier 3 parts often exceeds the price of a better vehicle. A mid-tier car with full Tier 2 upgrades might cost 40,000 credits in parts, but a high-tier car with stock parts might cost only 35,000 credits and outperform it immediately. The upgrade menu does not warn you about this diminishing return, so you need to track your own spending and recognize when a new car is the smarter investment.
The general rule from community data is that you should stop upgrading a car once the next part costs more than 30% of the price of your next desired vehicle. At that point, saving your credits toward the new car produces a bigger performance jump than installing another part on your current ride. This rule keeps your progression efficient, because it prevents you from sinking credits into a car you will eventually replace. If you are still deciding between upgrading your current car or saving for a new one, the car collection guide breaks down which vehicles offer the best value at each price point.
Ghost Driver Car Parts Comparison: Making Smart Purchase Decisions
Comparing Ghost Driver car parts requires looking beyond the stat numbers, because the upgrade menu does not show you the full picture of how each part affects real-world driving. The key is to evaluate parts based on your crash history, your credit income, and your long-term progression goals, rather than simply buying the most expensive option available. A part that costs 10,000 credits but saves you from one crash per run pays for itself in avoided repair costs within a few sessions, while a part that adds 5% top speed might never make a meaningful difference if you rarely reach your current top speed anyway.
The comparison also depends on your car's base stats, because a part that provides a 50% boost to a weak stat might be less valuable than a part that provides a 25% boost to a strong stat. The upgrade menu shows percentage increases, but the real-world impact depends on how often you use that stat during a typical run. Acceleration matters every time you recover from a dodge, while top speed only matters on long straight stretches, so acceleration upgrades often deliver more practical value even when their percentage boost is lower.
Part Value Rankings by Cost Efficiency
The most efficient Ghost Driver performance upgrades are the ones that deliver the largest practical improvement per credit spent, and community testing has produced a clear ranking. Tier 1 Engine is the best value in the game, because it provides a noticeable speed boost for a relatively low cost and improves every aspect of your highway driving. Tier 1 Tires is the second-best value, since better handling reduces crash frequency, which saves you money on repairs while also keeping your combo multiplier alive. Tier 1 Brakes rounds out the top three, because shorter stopping distances give you more reaction time in emergency situations.
| Part | Cost | Practical Value | Verdict |
|---|---|---|---|
| Tier 1 Engine | 2,500 | High — improves all driving | Buy first |
| Tier 1 Tires | 2,000 | High — reduces crashes | Buy second |
| Tier 1 Brakes | 1,800 | Medium-High — helps reaction time | Buy third |
| Tier 1 Exhaust | 2,200 | Medium — only helps recovery | Buy later |
| Tier 1 Suspension | 1,500 | Medium — situational stability | Buy last |
The ranking shifts when you compare Tier 2 and Tier 3 parts, because the cost scaling changes the value equation. A Tier 2 Engine at 10,000 credits provides roughly double the boost of a Tier 1 Engine at 2,500 credits, which means you pay four times the price for two times the performance. That trade-off is only worth it if you have already bought all the Tier 1 parts you need and have spare credits, because the marginal gain from a Tier 2 part is smaller than the gain from a new Tier 1 part on a different slot.
The Hidden Cost of Over-Upgrading
Every Ghost Driver car part you buy is a permanent investment, because the game does not offer a resale or trade-in system for installed upgrades. When you eventually buy a new car, the credits you spent on your old car's parts are gone, which means over-upgrading a vehicle you plan to replace is a direct loss. This hidden cost makes the upgrade path decision even more important, because it penalizes players who install Tier 3 parts on starter cars instead of saving toward a better vehicle.
The smart approach is to install only Tier 1 parts on cars you plan to replace, then invest in Tier 2 and Tier 3 parts only on your final car. This strategy maximizes your credit efficiency because you get the practical benefits of upgrades during your progression without wasting large sums on parts that will not transfer. If you are struggling to earn enough credits for consistent upgrades, the cash earning guide explains the most efficient grinding methods to accelerate your progression.
Ghost Driver Performance Upgrades Strategy: Building for the Long Run
The long-term strategy for Ghost Driver performance upgrades is to plan your purchases around your final car, not your current one, because the game's progression system rewards patience and punishes impulsive spending. Every credit you spend on a car you will eventually replace is a credit you cannot spend on your endgame vehicle, so the smartest players treat early upgrades as temporary investments that make grinding easier, not as permanent additions to their garage. This mindset changes how you approach the upgrade menu, because you start evaluating every purchase based on how quickly it pays for itself in increased earnings rather than how much it improves your current car.
The best long-term strategy is to set a target car, research its base stats, and plan your upgrade path backward from that vehicle. If your target car has strong top speed but weak acceleration, you know you will need Exhaust upgrades to compensate, so you can start saving for those parts early. If your target car has weak handling, you know Tires will be your first purchase after buying it. This forward planning ensures that your credits are always working toward your final build, rather than being scattered across multiple cars that you will abandon.
Building a Credit Reserve for Major Purchases
The single most important habit for long-term Ghost Driver success is maintaining a credit reserve for major purchases, because the game's best cars and Tier 3 parts cost far more than a single grinding session can earn. Players who spend every credit as soon as they earn it find themselves stuck with a mid-tier car and no path to upgrade, while players who save aggressively can jump to a top-tier vehicle the moment it becomes available. The upgrade menu reinforces this lesson, because the best parts are priced at levels that require multiple sessions of saving.
A good rule of thumb is to keep at least 20% of your total credit earnings in reserve at all times, which gives you a cushion for repair costs and unexpected opportunities. This reserve also lets you take advantage of limited-time events or new car releases without having to grind from zero. The upgrade priority guide offers a more detailed breakdown of which parts and cars deserve your credits first, based on community testing of the current pre-alpha build.
Adapting Your Build as the Game Evolves
Ghost Driver is still in pre-alpha, which means the upgrade system can change with any patch, and the best builds today might be obsolete tomorrow. The game was last updated on 2026-08-13, and the developer has promised a major update at 1,000 likes on the Roblox page, so the meta is likely to shift in the coming weeks. Players who stay flexible and adapt their upgrade strategy to each patch will have an advantage over those who commit to a single build and refuse to change.
The key to adapting is tracking your own performance data, because your crash patterns and earnings per run tell you which parts are working and which are not. If you install a new part and your crash rate does not improve, that part is not delivering value for your playstyle, and you should consider replacing it. The upgrade menu makes this easy to test, because you can see the stat changes before you buy, and you can compare your performance across multiple runs to measure the real-world impact.
Frequently Asked Questions
How do I access the Ghost Driver upgrade menu?
Open the dealership from the main lobby, select a car you own, and click the wrench icon in the bottom-right corner of the preview screen. The upgrade menu shows all available part slots, current stats, and purchase prices. You cannot upgrade cars you do not own, so buy the vehicle first before attempting to install parts.
What is the best upgrade path for a new player?
Start with the Tier 1 Engine, then Tier 1 Tires, then Tier 1 Brakes, because this order addresses the most common failure points: speed, handling, and stopping distance. After these three, add Exhaust and Suspension based on your remaining weaknesses. Save Tier 2 and Tier 3 parts for your final car, since they do not transfer between vehicles.
Do Ghost Driver performance upgrades transfer between cars?
No, upgrades are permanently installed on the car you purchased them for, with no resale or trade-in system. Every credit spent on a starter vehicle is a sunk cost once you replace it. Install only Tier 1 parts on early cars and reserve Tier 2 and Tier 3 investments for your endgame vehicle.
How many upgrades can I install on one car?
Every car has five upgrade slots: Engine, Exhaust, Tires, Brakes, and Suspension. You can install one part per slot, and each part comes in three tiers. The max upgrades for any car require all five slots filled with Tier 3 parts, though the practical best build depends on your playstyle and the car's base stats.
What is the most expensive upgrade in the game?
Tier 3 Pro-tier Engine upgrades are the priciest, costing 25,000–50,000 credits depending on the car. They deliver the largest stat boosts but demand heavy grinding. For most players, sticking with Tier 1 and Tier 2 parts until you own a top-tier car is the smarter investment.