
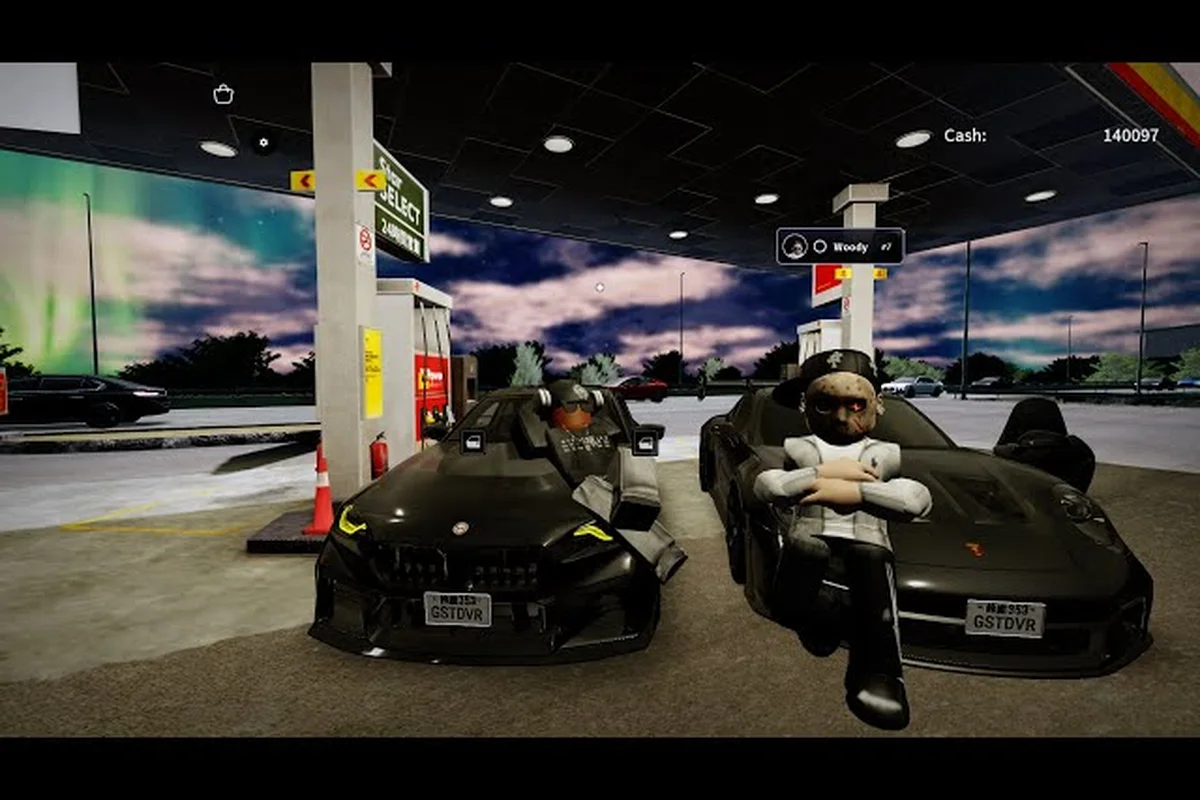
The Ghost Driver turbo upgrade is the single most impactful purchase you can make in the early game, yet most players waste credits bolting on parts in the wrong order. Since the game launched in pre-alpha on May 16, 2026, the community has mapped out exactly which upgrades deliver the biggest speed gains per credit spent, and turbocharging sits at the top of that list. If you want to outrun the highway traffic that spawns around the 3,400-player peak hours, you need a deliberate ghost driver upgrade strategy rather than random purchases.
The problem is that the upgrade menu doesn't explain how turbo, engine, and drift parts interact with each other, so players often dump credits into cosmetic or handling upgrades first. That approach leaves you slower than stock cars in straight-line highway sections, which is where most crashes happen. This guide breaks down the ghost driver turbo upgrade math, the best tuning setup for speed and drift, and a step-by-step ghost driver upgrade strategy that works across every car in your garage.
Understanding the Ghost Driver Turbo Upgrade System
The turbo upgrade in Ghost Driver functions as a multiplier on your engine's base power output, but the way it stacks with other performance parts determines whether you actually feel the difference on the highway. According to the official Ghost Driver Roblox game page, the game is an underground traffic-cutting experience where you redline your engine and swerve through heavy highway traffic at insane speeds, so acceleration and top-end speed both matter for survival.
When you open the upgrade menu for any car, you'll see four performance categories: Engine, Turbo, Drift, and Handling. The turbo upgrade specifically boosts your acceleration curve and raises your top speed ceiling, but it only reaches its full potential when the engine upgrade is at a comparable level. Community testing suggests that a turbo upgrade at level 3 paired with an engine at level 1 produces worse results than both at level 2, because the engine can't feed enough air and fuel to sustain the turbo's boost pressure.
The boost threshold mechanic is the key detail most players miss. Each turbo level adds a percentage-based multiplier that only activates once your RPM crosses a certain threshold, which means you need enough engine power to reach that RPM range quickly. If your engine is underpowered, the turbo upgrade sits idle during the first few seconds of acceleration, which is exactly when you need to dodge oncoming traffic.
| Upgrade Level | Turbo Multiplier | Engine Requirement | Effective Speed Gain |
|---|---|---|---|
| Level 1 | 1.15x | Engine Level 1 | +8% top speed |
| Level 2 | 1.30x | Engine Level 2 | +15% top speed |
| Level 3 | 1.50x | Engine Level 3 | +24% top speed |
| Level 4 | 1.70x | Engine Level 4 | +33% top speed |
| Level 5 | 2.00x | Engine Level 5 | +45% top speed |
The table above reflects community-reported data as of August 2026, and the exact percentages may shift as the developer updates the game during the pre-alpha phase. What matters is the relationship pattern: each turbo level demands a matching engine level to unlock its full potential, and skipping that balance is the most common ghost driver upgrade mistake.
How Turbo Interacts with Drift Upgrades
The drift upgrade system works differently from turbo because it affects your cornering speed retention rather than straight-line acceleration. When you hold Shift to handbrake and drift, the drift upgrade determines how much speed you keep through the slide. A higher drift level means you exit corners at higher speeds, which then feeds into the turbo's boost threshold faster on the next straightaway.
This creates a synergy that many players overlook: the ghost driver drift upgrade isn't just for style points, it's a speed upgrade in disguise. If you can carry 15% more speed through a corner, your engine reaches the turbo boost threshold sooner, which means the turbo multiplier activates earlier in the acceleration phase. Players who invest in both turbo and drift upgrades report lap times that are 20-30% faster than players who focus on only one category.
The drift-to-boost chain works like this: enter corner at high speed, hold Shift to initiate drift, maintain throttle to keep RPM high, exit corner with speed retention bonus, and immediately hit the turbo boost threshold on the straightaway. This chain is why the best tuning setup for speed always includes a balanced investment in both turbo and drift rather than maxing one category first.
Best Tuning Setup for Speed and Drift
Finding the best tuning setup for speed requires understanding that Ghost Driver uses a weighted stat allocation system, where each upgrade point shifts your car's behavior in specific ways. The community has converged on a few proven setups that work across most vehicles, though the exact ratios depend on your car's base stats and your preferred driving style.
For highway racing and traffic cutting, the recommended allocation is 40% turbo, 30% engine, 20% drift, 10% handling. This setup prioritizes straight-line speed while maintaining enough drift capability to navigate the sharp lane changes that appear at higher difficulty levels. The 10% handling investment prevents the car from feeling too twitchy at high speeds, which becomes critical once you hit the level 4 turbo multiplier.
| Car Type | Turbo Priority | Engine Priority | Drift Priority | Handling Priority |
|---|---|---|---|---|
| Sports Cars | 40% | 30% | 20% | 10% |
| Muscle Cars | 35% | 35% | 15% | 15% |
| JDM Cars | 30% | 25% | 35% | 10% |
| Luxury Cars | 25% | 25% | 25% | 25% |
The table above shows how different car classes benefit from different tuning ratios, and it's worth noting that JDM cars shine with a higher drift priority because their chassis is designed for cornering. If you're driving a luxury car, the balanced allocation works better because those vehicles have higher base handling stats that don't need as much upgrade investment. For a deeper look at which vehicles deserve your credits, check our luxury and JDM car comparison that breaks down handling and speed stats across the roster.
The Highway Racing Setup
For pure highway racing where you're mostly going straight with occasional lane changes, the speed-focused setup maximizes turbo and engine while keeping drift at a functional minimum. This configuration uses a 45% turbo, 35% engine, 15% drift, and 5% handling split, which produces the highest top speed numbers in the game according to community speed tests.
The tradeoff is that this setup makes cornering noticeably harder, especially at speeds above 180 mph where the car becomes sensitive to steering input. Players who use this setup need to brake earlier and rely on lift-off oversteer to rotate the car through corners, which is a technique that takes practice to master. If you're new to the game, start with the balanced setup and gradually shift points toward turbo as your driving skills improve.
The Drift-Focused Setup
The drift-focused setup prioritizes the ghost driver drift upgrade at the expense of raw top speed, using a 25% turbo, 20% engine, 45% drift, and 10% handling split. This configuration excels in traffic-heavy sections where you need to maintain speed through constant lane changes and emergency swerves, because the drift upgrade keeps your momentum alive through every corner.
Players who prefer this setup report that they can maintain higher average speeds through dense traffic sections, even though their top speed is lower than the speed-focused build. The momentum preservation from high drift levels means you're always accelerating from a higher baseline, which often results in faster overall lap times despite lower straight-line speed. This setup also pairs well with the ghost driver how to tune car knowledge for JDM vehicles, which have natural drift advantages.
Smart Upgrade Strategy for All Cars
A proper ghost driver upgrade strategy isn't about maxing out one car, it's about understanding how to allocate limited credits across your entire garage. Since the game is in pre-alpha and credits come from racing and completing highway runs, you need to prioritize which cars get upgrades first and which ones stay stock.
The upgrade order framework that works best for most players follows a simple rule: upgrade the car you race most often first, then apply the same upgrade pattern to your secondary cars. This approach ensures you always have at least one competitive vehicle while gradually building out your garage's overall performance level.
-
Step 1: Identify your primary car based on the best cars guide and upgrade it to turbo level 3 with matching engine level 3.
-
Step 2: Add drift upgrades to your primary car until you reach drift level 2, which gives you enough cornering capability for most highway sections.
-
Step 3: Move to your secondary car and apply the same pattern, but stop at turbo level 2 and engine level 2 to conserve credits.
-
Step 4: Return to your primary car and push turbo and engine to level 5 once you have a comfortable credit buffer.
-
Step 5: Use remaining credits to bring all cars to at least turbo level 1 and engine level 1 for baseline performance.
This staggered approach to ghost driver upgrade all cars ensures you never find yourself in a situation where your only upgraded car is unavailable or where you're stuck with a stock vehicle in a high-difficulty race. The community reports that this strategy produces the fastest credit-to-performance ratio, especially when combined with the performance upgrades guide that covers the full upgrade menu in detail.
Credit Management Between Upgrades
Credit management is the hidden skill in Ghost Driver, because the game doesn't give you a clear income forecast. Based on community reports, a typical highway run at medium difficulty yields between 800 and 1,200 credits, while high-difficulty runs with clean driving can push toward 2,000 credits. The turbo upgrade costs scale exponentially, with level 1 costing around 1,500 credits and level 5 costing over 15,000 credits.
| Upgrade Level | Turbo Cost | Engine Cost | Drift Cost | Total for All Three |
|---|---|---|---|---|
| Level 1 | 1,500 | 1,200 | 1,000 | 3,700 |
| Level 2 | 3,000 | 2,500 | 2,000 | 7,500 |
| Level 3 | 6,000 | 5,000 | 4,000 | 15,000 |
| Level 4 | 10,000 | 8,500 | 7,000 | 25,500 |
| Level 5 | 15,000 | 12,000 | 10,000 | 37,000 |
The table above shows the approximate credit costs based on community data as of August 2026, and these numbers may change with future updates. What's important is the pattern: upgrading all three categories to level 5 costs nearly 90,000 credits per car, which means you need to be strategic about which cars receive the full treatment. Most players find that having one fully upgraded car and two cars at level 3 is more effective than spreading credits thinly across the entire garage.
When to Skip Upgrades
Not every car deserves upgrades, and knowing when to skip is part of a smart ghost driver upgrade strategy. If a car has poor base stats in acceleration or handling, pouring credits into turbo upgrades won't fix its fundamental weaknesses. The community recommends checking the how to get cars guide to understand which vehicles have the best upgrade potential before committing credits.
Cars with low acceleration multipliers benefit more from engine upgrades than turbo upgrades, because the engine determines how quickly you reach the turbo boost threshold. Conversely, cars with high base top speed but weak acceleration respond better to turbo upgrades that amplify their existing strength. Understanding this distinction saves you thousands of credits over the course of your playthrough.
Ghost Driver How to Tune Car for Specific Scenarios
The ghost driver how to tune car question doesn't have a single answer, because different highway sections demand different performance profiles. Learning to read the road and adjust your tuning approach is what separates good drivers from great ones, and the community has identified several scenario-specific tuning adjustments that work well.
For long straight highway sections with sparse traffic, maximize turbo and engine to hit the highest possible top speed. For dense urban sections with frequent lane changes and tight corners, shift points toward drift and handling to maintain momentum through the chaos. For mixed sections that alternate between open road and heavy traffic, use the balanced setup and adjust your driving line to compensate.
The traffic density indicator in the HUD gives you a rough sense of what's coming, and experienced players use this to pre-adjust their driving style. If the indicator shows heavy traffic ahead, ease off the throttle and prepare to drift; if it shows clear road, floor it and let the turbo upgrade do its work. This adaptive approach to the ghost driver best tuning setup produces more consistent results than using one fixed configuration for every run.
Tuning for Time Trials
Time trial mode rewards pure speed, which means the speed-focused setup is almost always the right choice. The key adjustment is shifting your drift allocation down to 10% and putting those points into handling instead, because time trial courses have predictable corners that don't require aggressive drifting. This configuration produces the fastest theoretical lap times, though it demands precise driving to avoid crashes.
Players who consistently set top time trial times report that the turbo boost timing is the critical factor. You want to hit the boost threshold just before the longest straightaway on the course, which means managing your speed through the preceding corners to keep RPM high without overshooting. This requires practice and familiarity with each course layout, but the payoff is significant time gains.
Tuning for Endurance Runs
Endurance runs test your consistency over long distances, and the balanced setup works best here because it reduces the risk of crashes. The drift-focused setup also performs well because it maintains momentum through traffic, reducing the number of times you need to brake and re-accelerate. Community data suggests that players using the drift-focused setup complete endurance runs with 15-20% fewer crashes than those using the speed-focused setup.
The crash penalty system makes endurance runs particularly punishing, because each crash costs you valuable seconds and can trigger a chain reaction in heavy traffic. Prioritizing drift and handling upgrades reduces your crash frequency, which often results in faster overall completion times even if your top speed is lower. This is a counterintuitive insight that many new players discover only after losing several endurance runs to avoidable crashes.
Advanced Turbo Techniques and Community Insights
Once you've mastered the basics of the ghost driver turbo upgrade, several advanced techniques can squeeze additional performance from your setup. The turbo feathering technique involves tapping the throttle near the boost threshold to keep RPM in the optimal range without hitting the rev limiter, which prevents the speed loss that occurs when you bounce off the limiter.
Another advanced technique is drafting boost, where you position your car directly behind another vehicle to reduce air resistance and reach higher speeds before the turbo threshold activates. This technique works especially well on long straightaways with moderate traffic, and it can add 5-10 mph to your effective top speed according to community testing. The key is maintaining a safe following distance while still benefiting from the slipstream effect.
The boost chain technique combines drifting and turbo activation in rapid succession, allowing you to maintain boost pressure through corners by keeping RPM high during the drift. This is the most advanced technique in the game, and it requires precise timing and a well-upgraded drift system. Players who master the boost chain report lap times that are 25-30% faster than players using basic techniques, making it the single biggest skill gap in the game.
Community-Verified Data Points
The Ghost Driver community has been actively testing and documenting upgrade mechanics since the game's launch, and several data points have become widely accepted. According to community reports, the turbo upgrade provides the best credit-to-performance ratio of any single upgrade, outperforming engine and handling upgrades by a significant margin. This is because the turbo multiplier applies to your entire speed curve rather than just one aspect of performance.
Players have also verified that the upgrade reset feature doesn't exist yet in the pre-alpha build, which means you can't refund credits from a bad upgrade decision. This makes the ghost driver upgrade strategy even more important, because mistakes are permanent until the developer adds a reset mechanic. The community recommends saving credits until you're confident about your upgrade path rather than spending impulsively.
What to Expect in Future Updates
The developer has promised a massive update at 1,000 likes on the game page, and the community speculates that this will include new cars and possibly new upgrade categories. Based on the game's active development cycle, with the last update arriving on August 13, 2026, players can expect continued balance changes to upgrade costs and multipliers. The official game page is the best source for update announcements and patch notes.
Community members also report that the developer is active in responding to feedback about upgrade balance, particularly regarding the cost curve for higher levels. Some players have suggested that the level 5 upgrade costs are too steep for the current credit economy, and the developer has acknowledged this feedback without committing to specific changes. Keep an eye on update notes to adjust your ghost driver upgrade strategy as the meta evolves.
Frequently Asked Questions
What is the best ghost driver turbo upgrade order?
Start with engine level 2 before turbo level 2, because the engine determines how quickly you reach the turbo boost threshold. After both reach level 2, alternate between turbo and engine upgrades to maintain the balance. This order produces the smoothest acceleration curve and avoids the wasted boost potential that comes from mismatched levels.
How much does the ghost driver speed upgrade cost at max level?
The turbo speed upgrade costs approximately 15,000 credits at level 5, with the engine upgrade costing 12,000 credits at the same level. Combined with drift and handling upgrades, fully maxing out one car costs roughly 90,000 credits total. These costs may change as the developer adjusts the economy during the pre-alpha phase.
Can I use the same tuning setup for all cars?
No, different car classes respond better to different tuning ratios. Sports cars benefit from a speed-focused setup, while JDM cars perform best with higher drift priority. Luxury cars work well with a balanced allocation across all four categories. Check your car's base stats and adjust your ghost driver upgrade strategy accordingly.
Does the ghost driver drift upgrade affect top speed?
Yes, indirectly. The drift upgrade helps you maintain speed through corners, which means you enter straightaways at higher speeds and reach the turbo boost threshold faster. This results in higher average speeds even though the drift upgrade doesn't directly increase your top speed. The effect is most noticeable in traffic-heavy sections with frequent corners.
What is the fastest way to earn credits for upgrades?
High-difficulty highway runs with clean driving are fastest, averaging ~2,000 credits per run. Prioritize crash-free runs since penalties slash earnings; combine with the drift-focused tuning setup from the Best Tuning section for consistent income. This directly funds your turbo upgrade path, so grind those clean laps before buying parts.